Azure API Management is a hosted API gateway service on Microsoft Azure cloud with comprehensive API management capabilities. In terms of security, it can be tightly integrated with Azure Active Directory to provide client OAuth 2.0 authentication mechanisms. The official documentation is somewhat brief, so this article provides detailed explanations of the authentication mechanism and configuration process.
Core Mechanism
Register 2 applications in Azure AD: one corresponding to the API created in API Management, and one corresponding to the client application accessing the API. In Azure AD, authorize the client application to access the backend API. Associate the API in API Management with the backend application in Azure AD. Finally, use the client application to request an access token to access the backend API.
This article will not elaborate on creating APIs in API Management. If needed, please refer to the official documentation https://docs.microsoft.com/en-us/azure/api-management/add-api-manually. Here we directly use an API that has already been deployed in API Management.
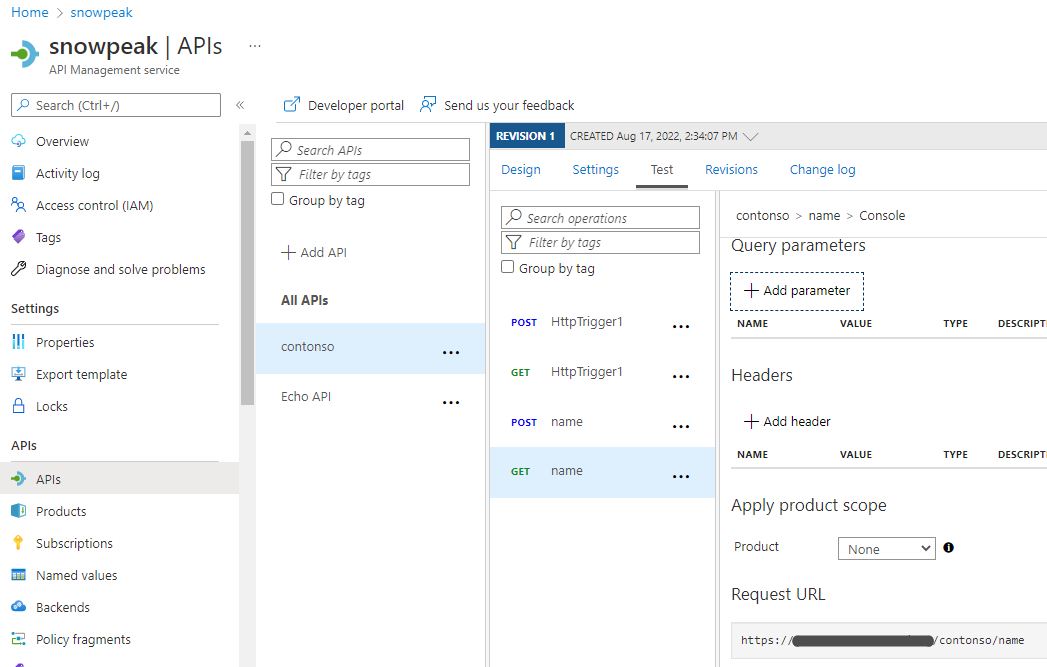
For simplicity, we set this API to not require a subscription key, i.e., uncheck "Subscription required" in Settings. This way, the API currently has no restrictions and can be accessed directly. Like:
curl https://contonso.azure-api.cn/contonso/name?name=test
{"message": "Hello, test! Welcome to Azure Function!", "timestamp": "2022-09-04, 14:35:34"}
Below we will add OAuth 2.0 token to this API to protect it.
Azure AD Deployment
Register Azure AD Application for Backend API
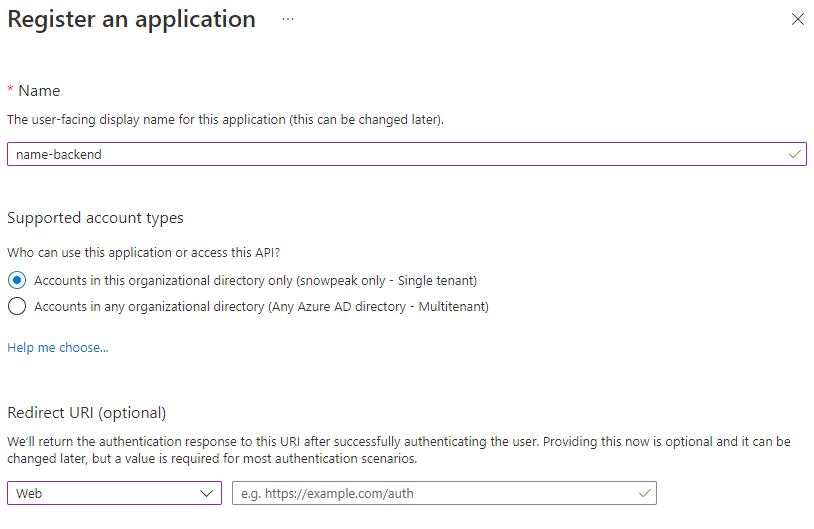
In the Azure console, go to Azure Active Directory and select App Registrations. Click "New registration" on the right side. Enter a meaningful name, for example, we name it "name-backend" here. Select Web for Redirect URI, keep other defaults, and click the Register button.
After successful creation, on the Overview page, record the Application (client) ID of this application. As shown here:
Display name: name-backend
Application (client) ID: 95ac855d-724d-4bf7-95b1-93244f4e2e5b
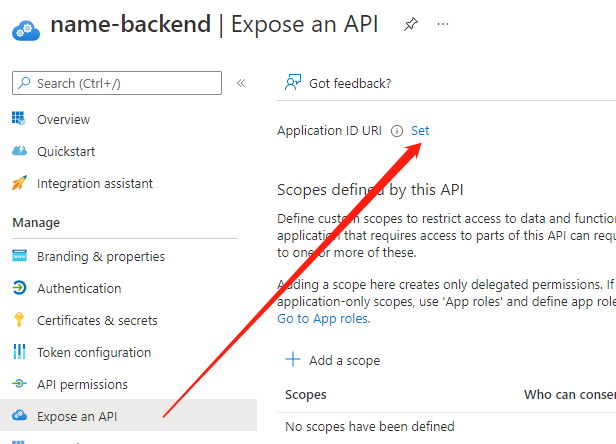
In the left navigation links under the Manage section, click "Expose an API", then click the "Set" link on the right side of Application ID URI.
Use the default value and click the Save button to save.
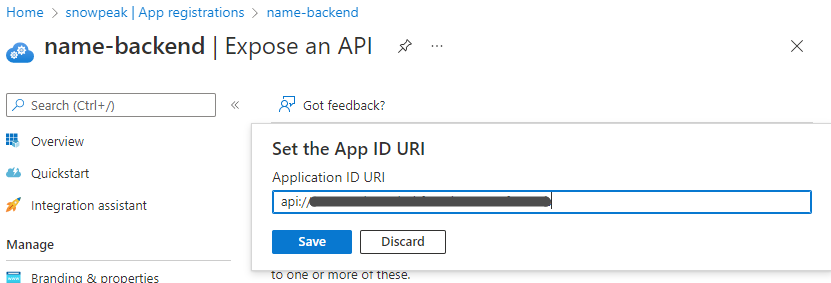
Also record this Application ID URI.
In the Manage section, click "App roles" then click "Create app role".
Display name: Enter a meaningful name, such as Reader.
Allowed member types: Select Applications
Value: Enter a meaningful value, such as Read
Description: Enter a meaningful value, such as "Readers have rights to read."
Do you want to enable this app role?: Check this.

Finally click Apply to save.
Set the version of returned token
In the left navigation menu under Manage, click Manifest, find accessTokenAcceptedVersion in the right main pane, and set its value to 2.
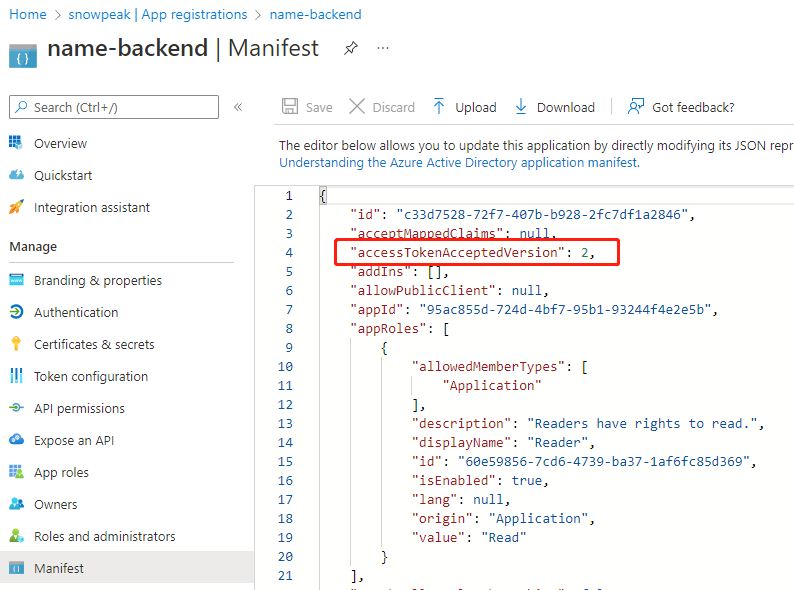
This step is very important because JWT in API Management only supports version 2.0 format. If this value is not modified, the token publisher URL format parsed from the JWT token obtained by calling the Azure AD interface will be incorrect, and subsequent verification will not pass.
Register Azure AD Application for Client
In the Azure console, go to Azure Active Directory and select App Registrations. Click "New registration" on the right side. Enter a meaningful name, for example, we name it "name-client" here. Select Web for Redirect URI, keep other defaults, and click the Register button.
After successful creation, on the Overview page, record the Application (client) ID value of this application. As shown here:
Display name: name-client
Application (client) ID: 6bfe51f7-ea34-4096-aa7c-7e8df1043bbd
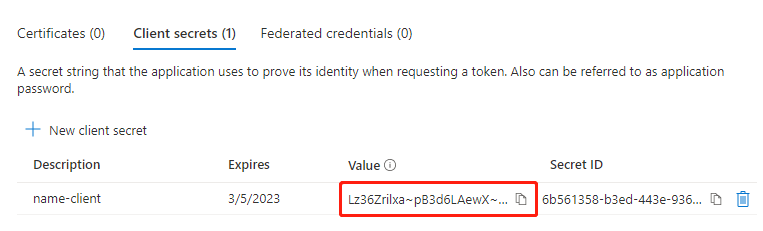
Create a secret for this client application. In the left navigation menu under Manage, click "Certificates & secrets". Under "New client secret", click "New client secret". In the popup layer, enter "name-client" for Description, then click the Add button below to add.
When the addition is complete, you must copy and save the secret value when it's displayed for the first time, as it will no longer be displayed after refreshing the page. If you don't save it in time, you can only delete it and create a new one.
Grant Permissions to Applications in Azure AD
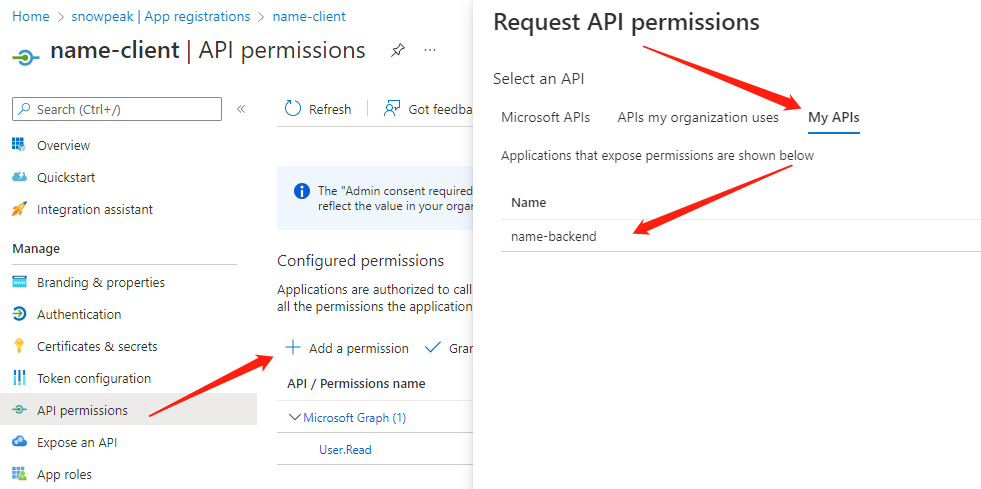
In Azure AD's App registrations, select the client application just created, and click "API permissions" under the Manage section in the left navigation. In the right pane, click "Add a permission". Select the backend application "name-backend" we created earlier.
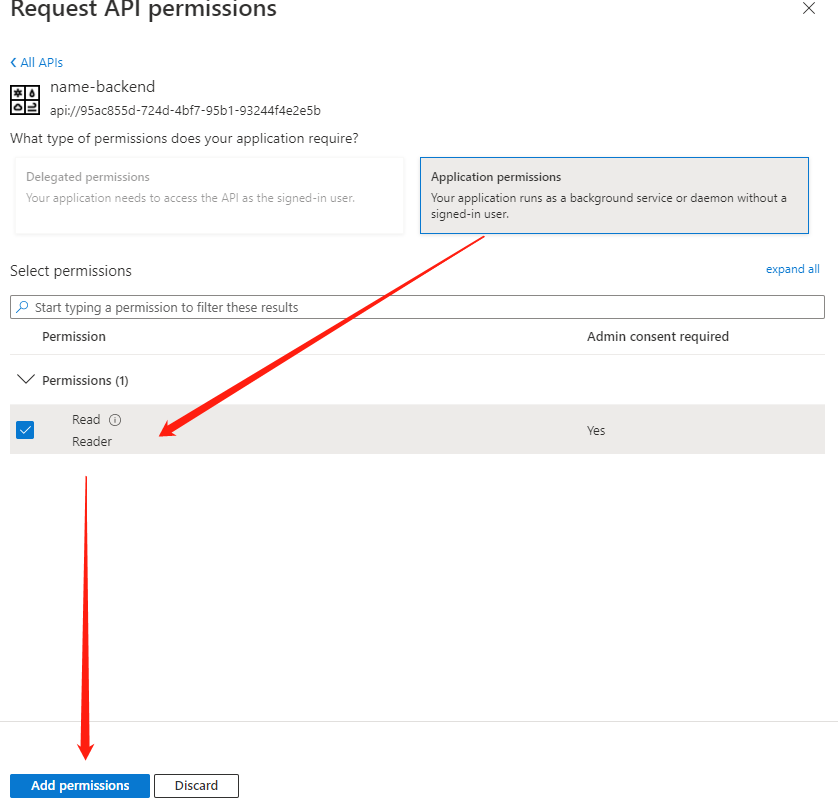
Then select "Application permissions" and select the role we have already created below. Click "Add permissions".
This will return to the Configured permissions list, and the Status column will be blank.

Click Grant admin consent for <your-tenant-name>, click Yes in the popup. Then the Status column should show a green checkmark.

Configure JWT Policy in API Management
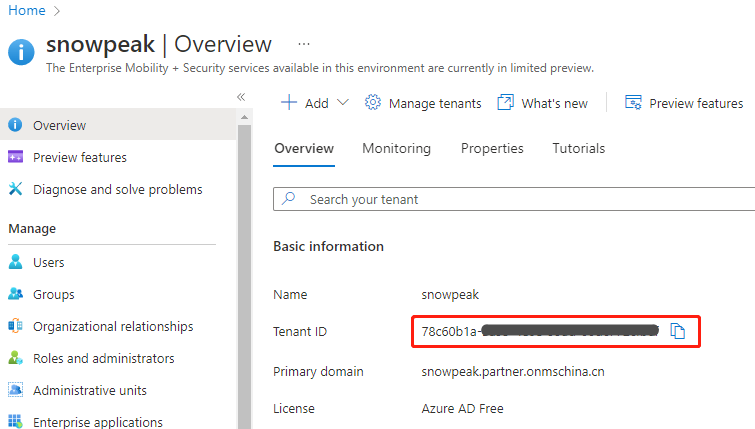
First go to the Overview page of the Azure AD console and record the current Tenant ID.
Prepare the Open ID URL. When using Azure global regions, this URL pattern is:
https://login.microsoftonline.com/{Tenant-ID}/v2.0/.well-known/openid-configuration
When using Azure China regions, this URL pattern is:
https://login.partner.microsoftonline.cn/{Tenant-ID}/v2.0/.well-known/openid-configuration
In the API Management console, open the API we have prepared. In the Design interface, click "Add policy" for Inbound policy.

Scroll down and select "Validate JWT".
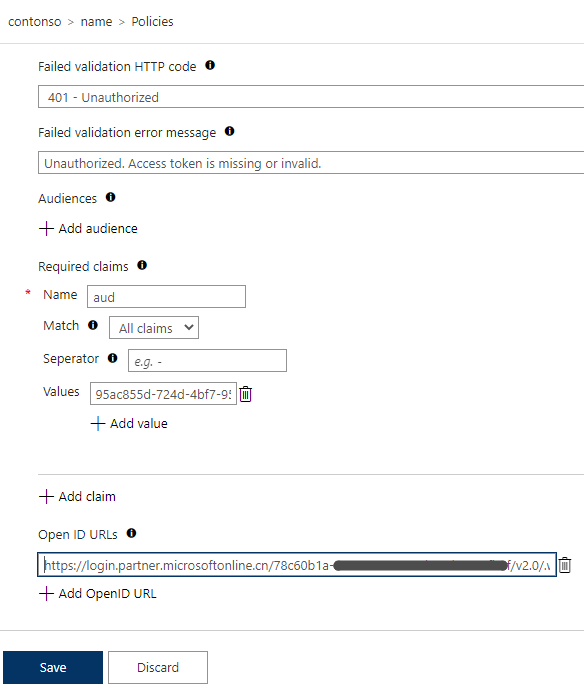
Enter "Authorization" for Header name.
Enter "Unauthorized. Access token is missing or invalid." for Failed validation error message.
Click "Add claim", enter "aud" for name. Then click "Add value", enter the client ID of the backend application registered in Azure AD that we recorded earlier for Values.
Click "Add Open ID URL", enter the Open ID URL prepared earlier. Click the Save button at the bottom to save.
At this point, enabling OAuth 2.0 authentication for the API is complete. Now when we directly access this API, it returns an authentication failure error.
curl https://snowpeak.azure-api.cn/contonso/name
{ "statusCode": 401, "message": "Unauthorized. Access token is missing or invalid." }
Verification and Testing
Obtain Access Token Using Client Application in Azure AD
We use the standard OAuth 2.0 flow to organize the request. Use the Azure AD Tenant ID mentioned earlier to organize the target address. When using Azure global regions, the target address is:
https://login.microsoftonline.com/{Tenant-ID}/oauth2/v2.0/token
When using Azure China regions, the target address is:
https://login.partner.microsoftonline.cn/{Tenant-ID}/oauth2/v2.0/token
Parameter descriptions are as follows:
| Parameter Name | Parameter Value |
|---|---|
| grant_type | client_credentials |
| client_id | The Application (client) ID of the client application mentioned earlier, such as 6bfe51f7-ea34-4096-aa7c-7e8df1043bbd |
| client_secret | The secret of the client application mentioned earlier, such as Lz36Zrilxa~01234567890#ABCDEFGH |
| Scope | Organized with the backend application ID in the format {backend-application-Application-ID}/.default, such as 95ac855d-724d-4bf7-95b1-93244f4e2e5b/.default |
After organizing the request address and parameters, we send the request with curl and get a response. Note to add a Content-Type: application/x-www-form-urlencoded request header.
curl -X POST -H "Content-Type: application/x-www-form-urlencoded" -d
'client_id=6bfe51f7-ea34-4096-aa7c-7e8df1043bbd&client_secret=Lz36Zrilxa~pB3d6LAewX~33~6rWREFLC.&scope=95ac855d-724d-4bf7-95b1-93244f4e2e5b/.default&grant_type=client_credentials'
'https://login.partner.microsoftonline.cn/78c60b1a-3a93-4e0e-99ad-00dc772cfb6f/oauth2/v2.0/token'

{"token_type":"Bearer","expires_in":3599,"ext_expires_in":3599,"access_token":"eyJ0eXAiOiJKV1QiLCJhbGciOiJSUzI1NiIsImtpZCI6Il9DSkFPdHlzWVZtNXhjMVlvSzBvUTdxeUJDUSJ9.eyJhdWQiOiI5NWFj......"}
Open https://jwt.ms/ in a browser and let's parse the returned access_token.
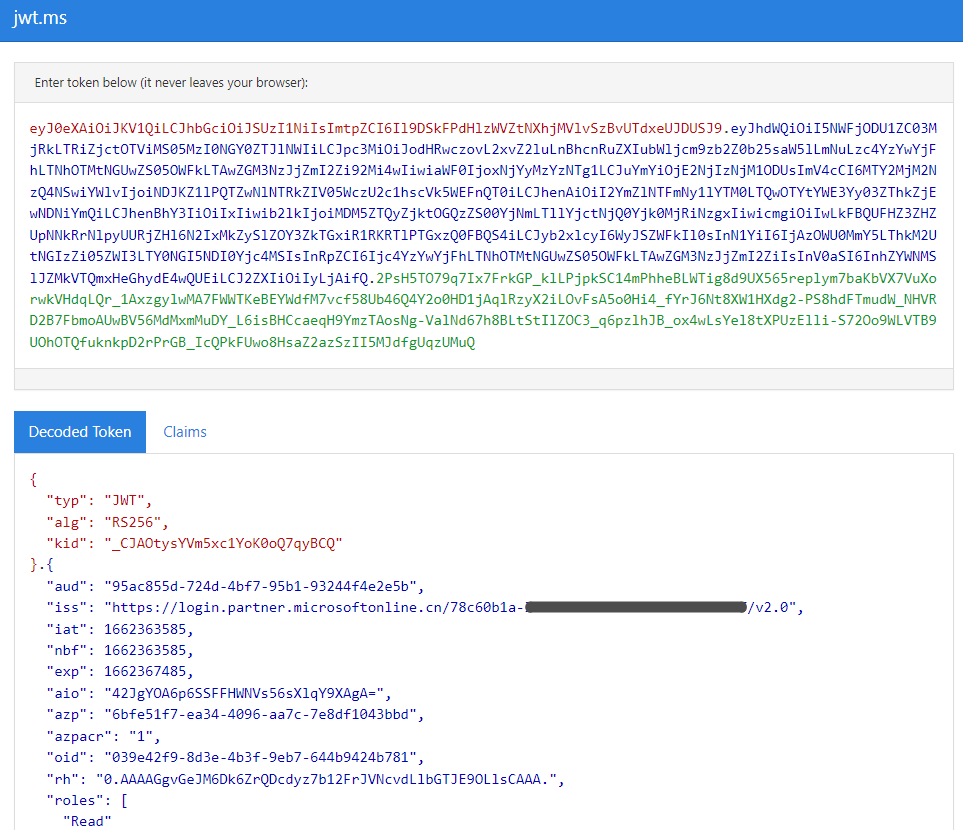
You can see the detailed token information parsed, where "iss" is the token publisher's URL. This is the effect of setting accessTokenAcceptedVersion to 2 for the backend application earlier.
Finally, we add the request header and access the API that now has authentication enabled.
curl -H 'Authorization: Bearer
eyJ0eXAiOiJKV1QiLCJhbGciOiJSUzIlvSzBvUTdxeUJDUSJ9.eyJhdWQiOiI......'
'https://snowpeak.azure-api.cn/contonso/name?name=test'
{"message": "Hello, test! Welcome to Azure Function!", "timestamp": "2022-09-05, 07:50:57"}
You can see that it passed verification and returned normal results.